扩展开发
Gopeed 支持使用JavaScript进行扩展开发,扩展可以增强 Gopeed 的功能,比如下载某个网站的视频,或者下载某个网站的音乐等等,可以通过官方示例快速了解一下。
Gopeed 扩展基于git来实现去中心化的扩展管理,只要将扩展源码托管到远程 git 仓库中,就可以通过 Gopeed 进行安装和更新,所以无论是github、gitee、gitlab还是其它 git 托管平台,都可以作为扩展的托管仓库。
快速开始
使用脚手架搭建
Gopeed 提供了脚手架来帮助你快速创建一个扩展开发项目模版:
npx create-gopeed-ext@latestnpx create-gopeed-ext@latest在创建过程中,将会看到以下提示:
√ Project name (gopeed-extension-demo) ...
√ Choose a template » Webpack

Success! Created gopeed-extension-demo at D:\code\study\js\gopeed-extension-demo
Inside that directory, you can run several commands:

  git init
    Initialize git repository

  npm install
    Install dependencies

  npm run dev
    Compiles and hot-reloads for development.

  npm run build
    Compiles and minifies for production.

We suggest that you begin by typing:

  cd gopeed-extension-demo

Happy coding!
√ Project name (gopeed-extension-demo) ...
√ Choose a template » Webpack
Success! Created gopeed-extension-demo at D:\code\study\js\gopeed-extension-demo
Inside that directory, you can run several commands:
git init
Initialize git repository
npm install
Install dependencies
npm run dev
Compiles and hot-reloads for development.
npm run build
Compiles and minifies for production.
We suggest that you begin by typing:
cd gopeed-extension-demo
Happy coding!手动搭建
如果你对node.js周边工具不太熟悉,也可以手动创建一个项目,文件结构如下:
├── index.js
├── manifest.json
├── index.js
├── manifest.json本地调试
在项目搭建好之后,需要进行本地调试,可以将本地的扩展项目安装到 Gopeed 中进行调试,具体步骤如下:
- 开启
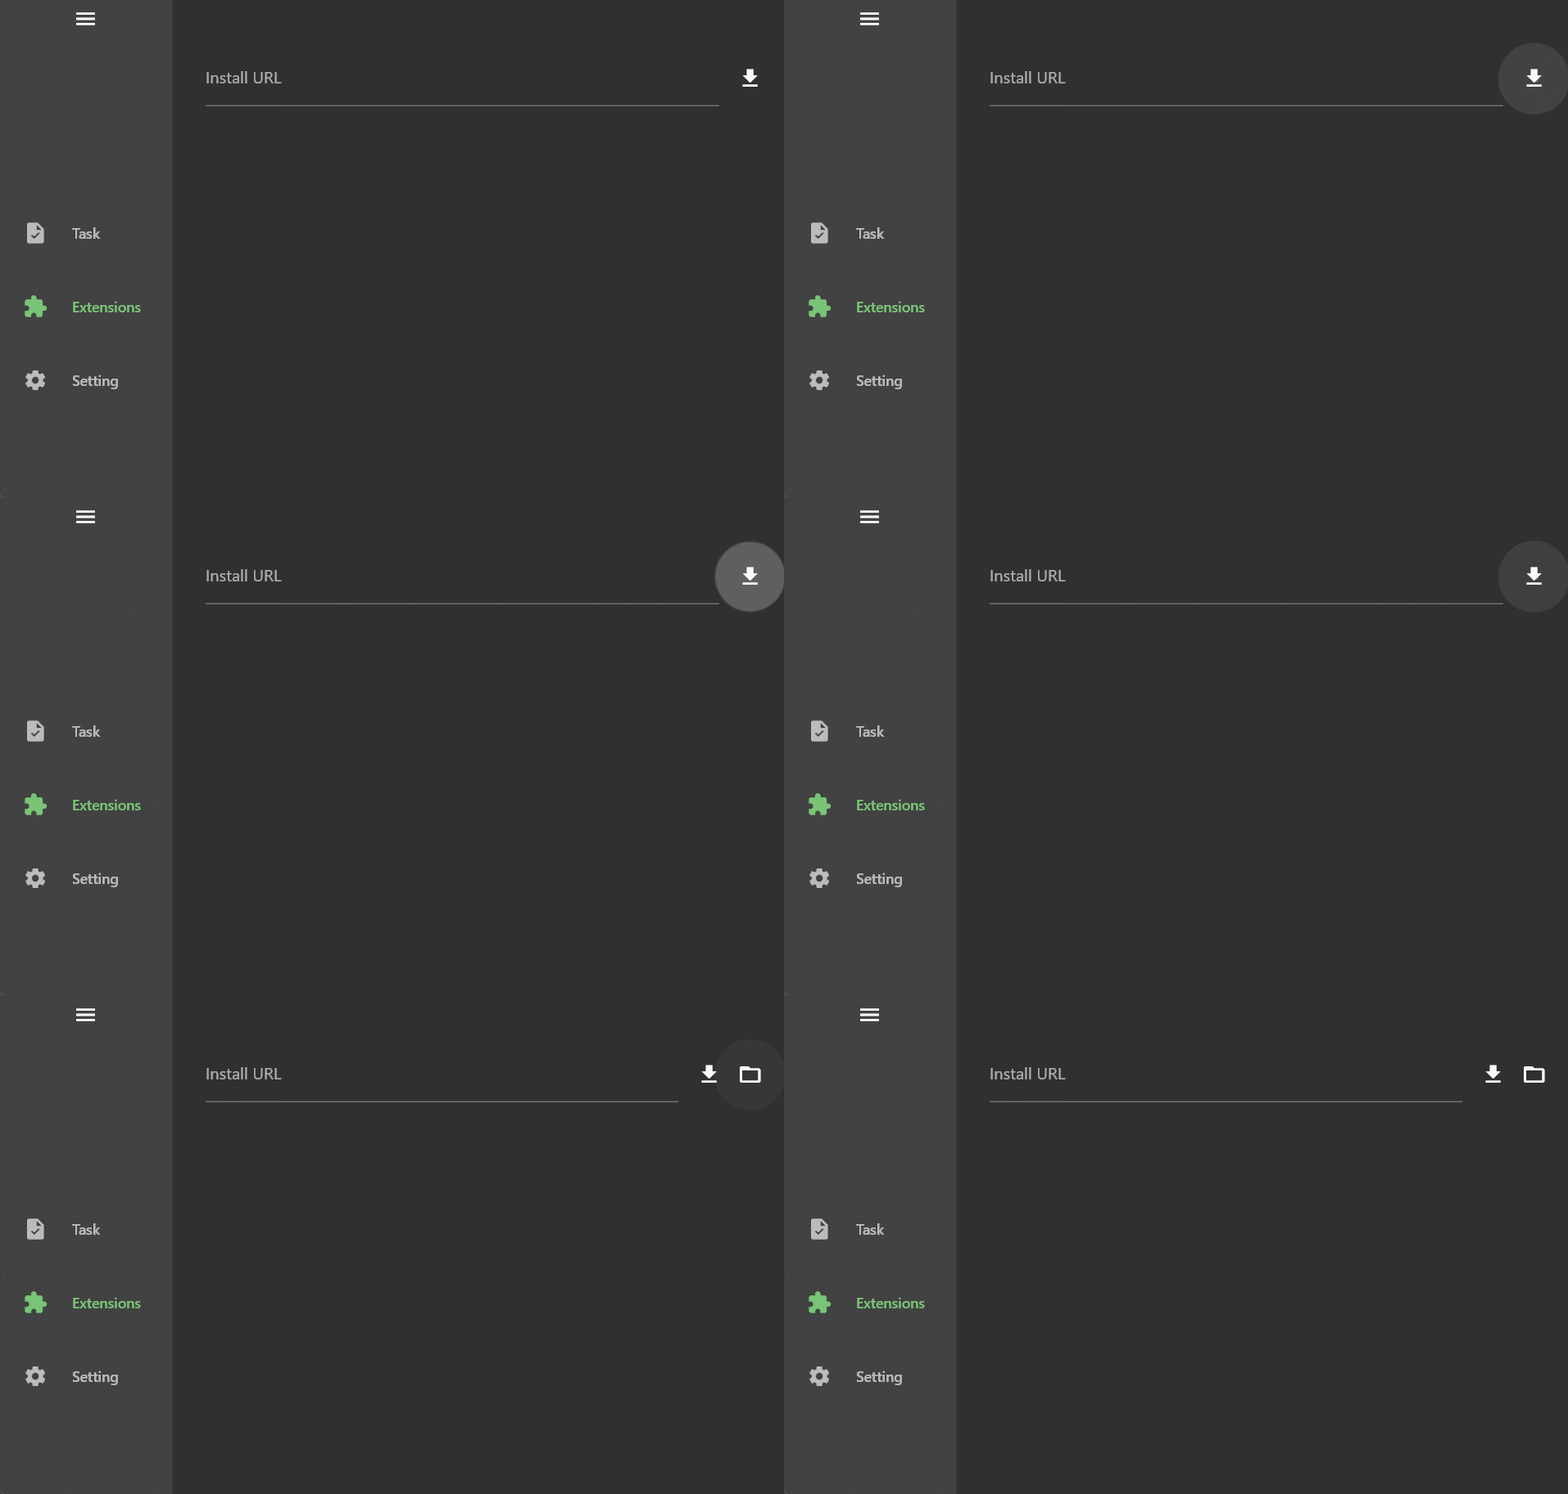
Gopeed开发者模式,在扩展页面连续点击 5 次安装按钮,即可开启开发者模式。

点击按钮在目录选择器中选择扩展目录,进行安装。
如果使用脚手架中
webpack模式,可以通过npm run dev启动自动编译。创建任务即可看到扩展生效了。

可以看到通过脚手架创建的示例扩展,可以实现使用https://github.com/hello链接创建任务时,解析出一个example/index.html文件
注:开发者模式只在桌面平台有效。
开发解析
上一节中,已经能够创建一个基础的扩展并进行本地调试了,但是在面纱之下,它究竟是怎么运作的呢?
首先我们来看一下manifest.json文件,这个是扩展的清单文件,它描述了扩展的信息,每个扩展项目根目录中必须包含一个manifest.json文件,本节中的示例文件如下:
{
  "name": "gopeed-extention-demo",
  "author": "",
  "title": "gopeed extention demo title",
  "description": "gopeed extention demo description",
  "icon": "",
  "version": "1.0.0",
  "homepage": "",
  "repository": {
    "url": ""
  },
  "scripts": [
    {
      "event": "onResolve",
      "match": {
        "urls": ["*://github.com/*"]
      },
      "entry": "dist/index.js"
    }
  ],
  "settings": []
}
{
"name": "gopeed-extention-demo",
"author": "",
"title": "gopeed extention demo title",
"description": "gopeed extention demo description",
"icon": "",
"version": "1.0.0",
"homepage": "",
"repository": {
"url": ""
},
"scripts": [
{
"event": "onResolve",
"match": {
"urls": ["*://github.com/*"]
},
"entry": "dist/index.js"
}
],
"settings": []
}接下来逐一介绍一下各个字段的含义:
name和author:Gopeed 中会使用<author>@<name>作为扩展的 ID,填写author后能确保不容易和别的扩展重名导致被覆盖安装,所以强烈建议填写author字段。title和description:扩展的标题和描述。icon:扩展图标,填写相对路径,示例:icon.png。version:扩展版本,使用 semver 规范,扩展更新时是基于此字段进行比较的,所以请确保版本号是符合规范的。homepage:扩展主页,示例:https://gopeed.com。repository:扩展所属 git 仓库地址,Gopeed 扩展依赖git来实现去中心化的扩展管理,所以如果你的扩展需要被用户安装和更新,那么就必须将扩展源码托管到远程 git 仓库中,并配置此字段示例:
json{ "url": "https://github.com/gopeed/gopeed-extension-demo" }{ "url": "https://github.com/gopeed/gopeed-extension-demo" }如果一个 git 仓库中包含多个扩展项目的话,可以通过
directory属性指定子目录,示例:json{ "url": "https://github.com/GopeedLab/gopeed-extension-samples", "directory": "github-contributor-avatars-sample" }{ "url": "https://github.com/GopeedLab/gopeed-extension-samples", "directory": "github-contributor-avatars-sample" }在 Gopeed 安装时,需要通过
#进行分割,即安装链接为https://github.com/GopeedLab/gopeed-extension-samples#github-contributor-avatars-sample。scripts:敲重点!这里是 Gopeed 扩展激活事件的配置。示例项目中配置的
onResolve事件会在解析任务时触发,通过match.urls字段来匹配任务创建的 url,如果匹配成功,则会运行entry字段指定的脚本文件,在上面的脚手架项目示例中,配置了匹配*://github.com/*,然后运行dist/index.js文件,所以当我们输入一个https://github.com/hello链接时被匹配到,然后触发了扩展脚本的执行,这里先不讲脚本的内容,后面会详细介绍。匹配规则和 chrome 扩展的匹配规则一致,可以参考这里
settings:扩展设置项,通过配置声明可以在 Gopeed 中生成对应的设置界面,提供用户自定义设置,例如自定义Cookie、自定义User-Agent等等,示例:示例:
json[ { "name": "ua", "title": "User-Agent", "description": "自定义 User-Agent", "type": "string", "value": "Mozilla/5.0 (Windows NT 10.0; Win64; x64) AppleWebKit/537.36 (KHTML, like Gecko)" } ][ { "name": "ua", "title": "User-Agent", "description": "自定义 User-Agent", "type": "string", "value": "Mozilla/5.0 (Windows NT 10.0; Win64; x64) AppleWebKit/537.36 (KHTML, like Gecko)" } ]name:设置项名称,必填。title:设置项标题,必填。description:设置项描述,可选。type:设置项类型,可选值:string、number、boolean。value:设置项默认值,可选。
脚本编写
上一节中,我们已经知道了如何配置清单,接下来就来介绍下扩展脚本的编写。
运行环境
Gopeed 扩展脚本引擎是由goja来实现的,它是一个纯 Go 编写的 JavaScript 解释器,但是由于 goja 只是一个纯 js 运行时,所以浏览器和node.js的 API 都是不支持的,目前Gopeed实现了XMLHttpRequest、fetch两个 API,意味着你可以通过这两个 API 或者基于它们的第三方库来实现网络请求,比如axios、superagent等等。
另外需要注意一点的是,goja 原生支持大部分es6+的语法,但是极少部分语法是不支持的,比如async generator,但是没关系,通过脚手架创建的项目中已经配置好了bable,你可以愉快的使用最新的 es 语法,脚本最终会被编译成es5语法。
示例脚本解析
每当事件触发时,会运行entry字段指定的脚本文件,示例项目中的脚本文件如下:
gopeed.events.onResolve((ctx) => {
  ctx.res = {
    name: "example",
    files: [
      {
        name: "index.html",
        req: {
          url: "https://example.com",
        },
      },
    ],
  };
});gopeed.events.onResolve((ctx) => {
ctx.res = {
name: "example",
files: [
{
name: "index.html",
req: {
url: "https://example.com",
},
},
],
};
});接下来,我们逐一介绍一下脚本的内容:
gopeed.events.onResolve:这里是注册onResolve事件,方法里面就是扩展的具体逻辑了。ctx:事件上下文,包含了当前事件的一些信息,在onResolve事件中,ctx包含了以下字段:req:请求信息,包含了资源的 url、headers 等等。res:响应信息,脚本需要将解析出的文件列表赋值给ctx.res,Gopeed 会根据里面返回的文件列表进行下载。
简而言之就是需要在onResolve回调函数中,根据ctx.req里的请求信息,解析出需要下载的文件列表赋值给ctx.res即可,那么上面的脚本就很好理解了,就是解析出一个index.html文件和对应的下载地址,然后赋值给ctx.res。
关于
ctx的详细说明可以参考文档。
扩展设置
为了能让扩展具有更动态化的能力,Gopeed 提供了一套标准的配置项,通过声明settings属性,可以在 Gopeed 中生成对应的扩展设置界面,提供用户自定义设置,例如自定义Cookie、自定义User-Agent等等,来看看下面的示例:
{
  "settings": [
    {
      "name": "cookie",
      "title": "网站 Cookie",
      "description": "Cookie 可以通过浏览器开发者工具获取",
      "type": "string"
    },
    {
      "name": "quality",
      "title": "默认画质",
      "type": "number",
      "value": "1080",
      "options": [
        {
          "label": "1080P",
          "value": "1080"
        },
        {
          "label": "720P",
          "value": "720"
        },
        {
          "label": "480P",
          "value": "480"
        }
      ]
    }
  ]
}
{
"settings": [
{
"name": "cookie",
"title": "网站 Cookie",
"description": "Cookie 可以通过浏览器开发者工具获取",
"type": "string"
},
{
"name": "quality",
"title": "默认画质",
"type": "number",
"value": "1080",
"options": [
{
"label": "1080P",
"value": "1080"
},
{
"label": "720P",
"value": "720"
},
{
"label": "480P",
"value": "480"
}
]
}
]
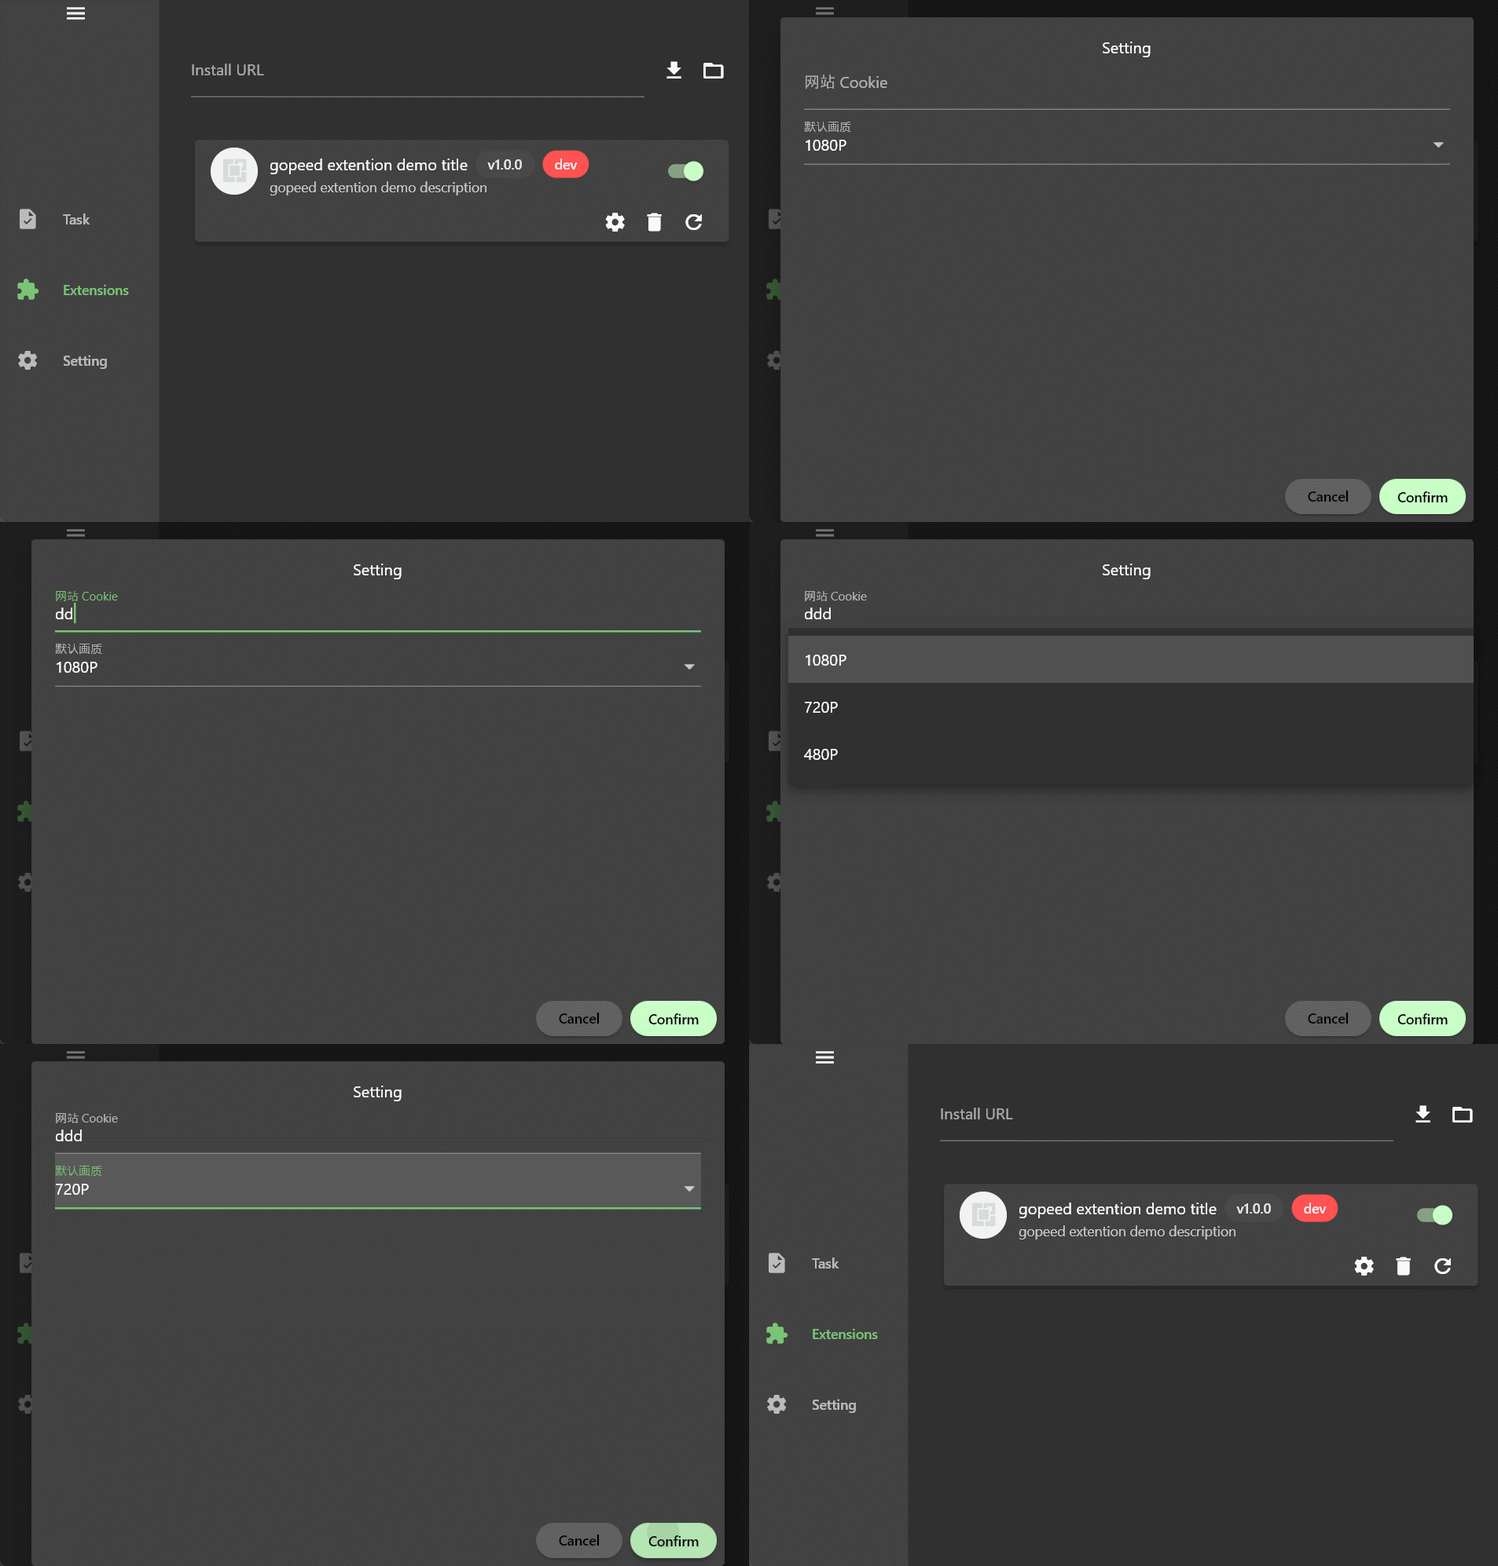
}这里声明了两个设置项,一个是cookie,一个是quality,来看看它们的效果:

可以看到cookie是一个输入文本框,quality是一个下拉框,这里需要注意的是,type字段决定了设置项的类型,目前支持三种类型:
stringnumberboolean
如果配置了options选项,那么就会渲染成下拉框供用户选择。
接着就是在扩展脚本中通过gopeed.settings获取设置的值了,示例:
gopeed.events.onResolve((ctx) => {
  // 访问cooke设置项
  console.log(gopeed.settings.cookie);
  // 访问quality设置项
  console.log(gopeed.settings.quality);
});gopeed.events.onResolve((ctx) => {
// 访问cooke设置项
console.log(gopeed.settings.cookie);
// 访问quality设置项
console.log(gopeed.settings.quality);
});扩展存储
Gopeed 提供了一套存储 API,以支持扩展持久化存储数据,例如登录token等等,示例:
gopeed.events.onResolve((ctx) => {
  // Get the token, if it not exists, then login
  const token = gopeed.storage.get("token");
  if(!token){
    const token = await login();
    gopeed.storage.set("token",token)
  }

  // Then do something with the token
  // ...
});gopeed.events.onResolve((ctx) => {
// Get the token, if it not exists, then login
const token = gopeed.storage.get("token");
if(!token){
const token = await login();
gopeed.storage.set("token",token)
}
// Then do something with the token
// ...
});注:详细的 API 可以参考文档。
扩展调试
在脚本中可以通过gopeed.logger对象进行日志输出,支持debug、info、warn、error三种级别,示例:
gopeed.logger.debug("debug");
gopeed.logger.info("info");
gopeed.logger.warn("warn");
gopeed.logger.error("error");gopeed.logger.debug("debug");
gopeed.logger.info("info");
gopeed.logger.warn("warn");
gopeed.logger.error("error");日志文件在 Gopeed 安装目录里的logs目录下,文件名为extension.log,可以通过tail -f extension.log命令实时查看日志。
注:debug 级别的日志仅在开发者模式安装的扩展中生效。
扩展发布
扩展开发完成后,如果是脚手架创建的webpack工程,需要编译一下:
npm run buildnpm run build然后我们要创建一个远程仓库,例如在github上创建了一个https://github.com/xxx/gopeed-extension-demo仓库,然后对应的修改一下manifest.json中的repository字段:
{
  "repository": {
    "url": "https://github.com/xxx/gopeed-extension-demo"
  }
}
{
"repository": {
"url": "https://github.com/xxx/gopeed-extension-demo"
}
}正确的配置
repository,可以让扩展获得远程更新的功能,如果扩展属于 git 仓库下的一个子目录,可以通过directory属性指定子目录,示例:json{ "repository": { "url": "https://github.com/xxx/gopeed-extension-demo", "directory": "path" } }{ "repository": { "url": "https://github.com/xxx/gopeed-extension-demo", "directory": "path" } }
这里还要记得配置好扩展的author和name字段,以降低和其它扩展重名的风险。
然后将项目推送到远程仓库即可完成发布,为了让用户更方便的在github检索 Gopeed 扩展,建议项目名字统一以gopeed-extension-开头,例如gopeed-extension-demo,并且在github中为项目打上gopeed-extension标签。
扩展安装
发布到远程仓库之后,就可以在 Gopeed 中安装了,打开扩展页面,输入扩展的 HTTP 协议的git clone地址(可以省略掉后面的.git后缀),点击安装按钮即可进行安装。
注:如果扩展目录是一个子目录,需要在地址后面加上
#,再加上子目录名称,例如https://github.com/xxx/gopeed-extension-demo#path。
官方示例
官方提供了两个具有代表性的示例扩展提供参考,分别是:
github-contributor-avatars-sample
此扩展是依赖于
node.js的项目,适用于复杂需求开发,通过cheerio库解析网页DOM,来获取需要下载的文件列表。此扩展是
纯js项目,无任何依赖,适用于简单需求开发,通过fetch实现网络请求,来获取需要下载的文件列表。
 Gopeed 文档